

Welcome to the kitchen where even the simplest ingredients can turn into something extraordinary! If you’ve ever found yourself staring at a pack of boneless, skinless chicken breasts wondering how to make them anything but bland, you’re in for a treat. Today, we’re diving into a method that will revolutionize your shredded chicken game: slow roasting.
Why slow roast, you ask? Because it’s all about texture and flavor. Slow roasting ensures that even the leanest cuts of chicken remain juicy and tender, while also allowing the flavors to meld together beautifully. Here’s how you can do it:
Ingredients:
- 2 boneless, skinless chicken breasts (~1 pound total, 8 oz each)
- 1/8 tsp black pepper
- 1/4 tsp salt
- 1 1/2 tsp olive oil
- 1/2 cup chicken broth
- 2 tbsp unsalted butter
Steps:
Preheat: Set your oven to 325°F. This lower temperature is key to slow roasting, preventing the chicken from drying out.
Prep the Chicken:
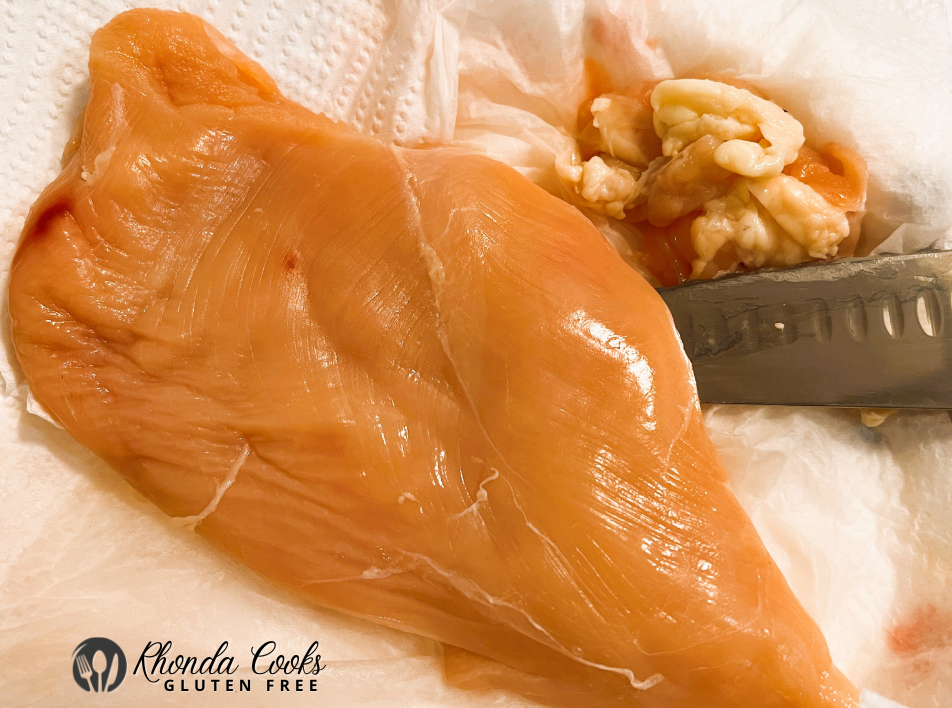
- Rinse your chicken breasts and pat them dry.
- Trim any excess fat with a sharp knife. If one breast is much larger, gently pound it with the flat side of a meat tenderizer to match the thickness of the other for even cooking. I LOVE my Pioneer Woman Frontier Collection Meat Tenderizer.
Set the Stage:
- Pour the olive oil into an 8×8 inch baking dish and swirl it around to coat the bottom. This not only prevents sticking but adds flavor.
Season and Hydrate:
- Place the chicken in the dish. Sprinkle with salt and pepper for that basic seasoning magic.
- Pour chicken broth around the breasts. This will keep the environment moist, infusing the chicken with flavor.
Butter Up:
- Top each chicken breast with 1 tablespoon of unsalted butter. Butter isn’t just for taste; it helps in achieving that perfect, succulent texture. I gnerally will cut it into thirds and just add it randomly on the chicken putting more on any thicker pieces.
Seal and Bake:
- Cover the dish tightly with aluminum foil. This traps the steam, ensuring the chicken stays moist.
- Bake for 60 minutes. Check the internal temperature with a meat thermometer; it should read 165°F at the thickest part.
Rest and Shred:
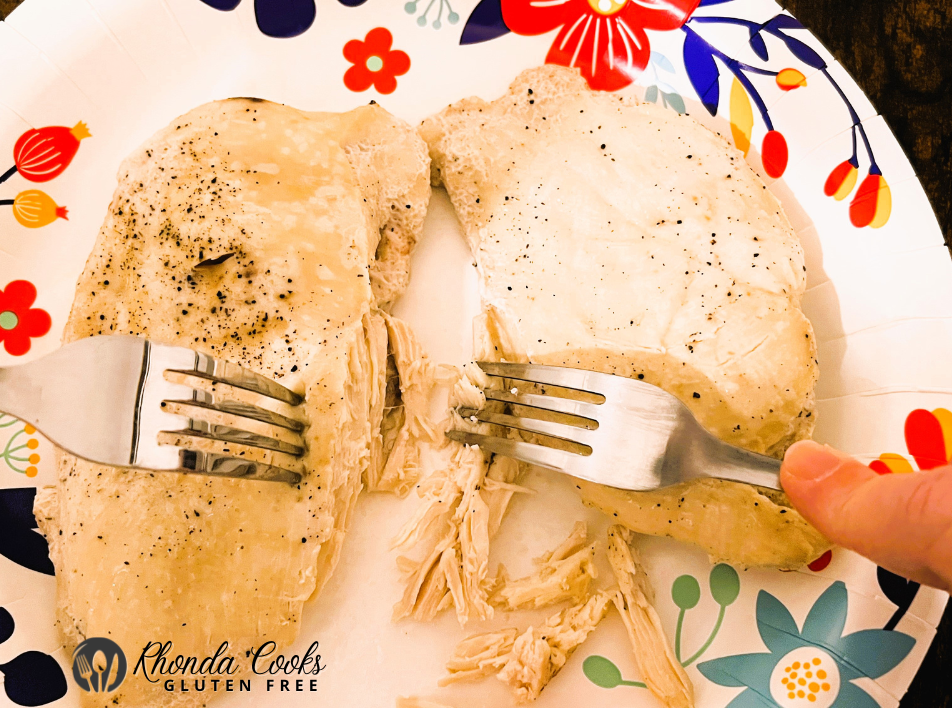
- Once cooked, transfer the chicken to a plate to rest for 5 minutes. This step is crucial for juiciness.
- Then, shred the chicken with two forks. It’s so tender, this part feels like a little victory dance!
Bonus Flavor:
- Don’t toss those drippings! They can be used to (sauté) simmer mirepoix for chicken and dumplings, chicken noodle soup, seasoned green beans, or anywhere you need an extra boost of flavor. It’s like recycling with flavor!
Yield:
- This recipe will yield approximately 3 cups of shredded chicken. Perfect for multiple meals or freezing for later!
How to Shred Chicken with Two Forks:
1. Cool Down:
- After roasting, let the chicken rest for about 5 minutes. This not only helps retain juices but makes the chicken easier to handle without burning your fingers.
2. Choose Your Forks:
- Grab two forks. The size doesn’t matter much, but having one with longer tines might give you better leverage. However, even standard dinner forks will work just fine.
3. Anchor and Pull:
- Hold one fork in each hand. Use one fork to anchor or hold down the chicken breast firmly on your plate or cutting board.
- With the other fork, insert the tines into the chicken and start pulling away from the anchor fork. You want to pull in the direction of the meat’s natural grain for the easiest shredding.
4. Shredding Motion:
- Move the pulling fork back and forth while maintaining pressure to start breaking the meat apart. Don’t worry if pieces are not uniform at first; the action will naturally create smaller, shredded pieces.
- Keep the anchor fork steady, using it to guide the shredding process. As you pull, the meat will start to separate into strands.
5. Continue and Refine:
- Continue this pulling and raking motion across the chicken breast. If you encounter tougher parts, you might need to adjust your angle or apply a bit more pressure.
- For larger pieces that don’t easily shred, you can either cut them into smaller chunks first or work at them longer with your forks.
6. Check for Consistency:
- You’re aiming for consistent, bite-sized pieces. If some are still too large, just keep at it until you’re satisfied with the texture.
7. Gather Your Shredded Chicken:
- Once shredded to your liking, you can either leave it on the plate for immediate use or transfer it into a bowl or container for storage or further use in recipes.
Tips:
- Patience: Shredding chicken can be a bit labor-intensive, but it’s worth it for the texture and versatility of the end product.
- Cool but Not Cold: If the chicken is too hot, it might be tougher to shred. If it’s too cold, it might not shred as easily. Room temperature or slightly warm is ideal.
- Uniformity: If you need very uniform shreds for a particular dish, like tacos, you might want to go over the chicken a second time to refine the shred.
This method is simple, requires no special tools, and gives you control over the size and texture of your shredded chicken, making it perfect for all sorts of recipes.
Meal Prep Tip:
- Double Up for Efficiency: Consider making a double batch of this chicken. Freeze half for future use if you’re not needing a double batch right away. Combined with make-and-freeze dumplings, you can have homemade chicken and dumplings ready in just 30 minutes on any given day.
Serving Suggestions:
- Chicken Salad: Perfect for a light lunch or dinner, mix with some mayo, celery, and grapes.
- Tacos: Shredded chicken makes an excellent taco filling, especially with a good salsa.
- Soups and Stews: Add this chicken to chicken noodle soup chicken chili or chicken and dumplings for an instant protein boost.
- Dips: Make a delicious chicken dip by combining ranch dressing, cream cheese, and your shredded slow-roasted chicken. It’s perfect for gatherings or a cozy night in.
Storage Tips:
If you’re not using the chicken immediately:
- Store Separately: Keep the shredded chicken and the drippings in different containers. This prevents the chicken from absorbing too much liquid, maintaining its texture when reheated.
- Refrigerate: They’ll keep for a couple of days in the fridge.
- Freeze: For longer storage, freeze them separately up to 3 months.
Remember: Cooking is not just about eating; it’s about creating moments, experimenting, and most importantly, enjoying the process. So, put on some music, pour yourself a glass of something nice, and let the aroma of slowly roasting chicken fill your home with warmth and anticipation.
Happy Cooking!
Juicy Flavorful Slow-Roasted Shredded Chicken Breasts
Transform ordinary chicken breasts into a succulent, flavor-packed delight with this easy slow-roast method. Perfect for meal prep or a comforting meal, yielding 3 cups of juicy shredded chicken ready for dips, salads, soups, tacos or the quickest chicken and dumplings you've ever made!
Ingredients
Instructions
-
Preheat:
Set your oven to 325°F. This lower temperature is key to slow roasting, preventing the chicken from drying out.
-
Prep the Chicken:
Rinse your chicken breasts and pat them dry.
Trim any excess fat with a sharp knife. If one breast is much larger, gently pound it with the flat side of a meat tenderizer to match the thickness of the other for even cooking. I LOVE my Pioneer Woman Frontier Collection Meat Tenderizer.
-
Set the Stage:
Pour the olive oil into an 8x8 inch baking dish and swirl it around to coat the bottom. This not only prevents sticking but adds flavor.
-
Season and Hydrate:
Place the chicken in the dish. Sprinkle with salt and pepper for that basic seasoning magic.
Pour chicken broth around the breasts. This will keep the environment moist, infusing the chicken with flavor.
-
Butter Up:
Top each chicken breast with 1 tablespoon of unsalted butter. Butter isn't just for taste; it helps in achieving that perfect, succulent texture. I gnerally will cut it into thirds and just add it randomly on the chicken putting more on any thicker pieces.

-
Seal and Bake:
Cover the dish tightly with aluminum foil. This traps the steam, ensuring the chicken stays moist.
Bake for 60 minutes. Check the internal temperature with a meat thermometer; it should read 165°F at the thickest part.

-
Rest and Shred:
Once cooked, transfer the chicken to a plate to rest for 5 minutes. This step is crucial for juiciness.
Then, shred the chicken with two forks. It's so tender, this part feels like a little victory dance!
-
Bonus Flavor:
Don’t toss those drippings! They can be used to (sauté) simmer mirepoix for chicken and dumplings, chicken noodle soup, seasoned green beans, or anywhere you need an extra boost of flavor. It’s like recycling with flavor!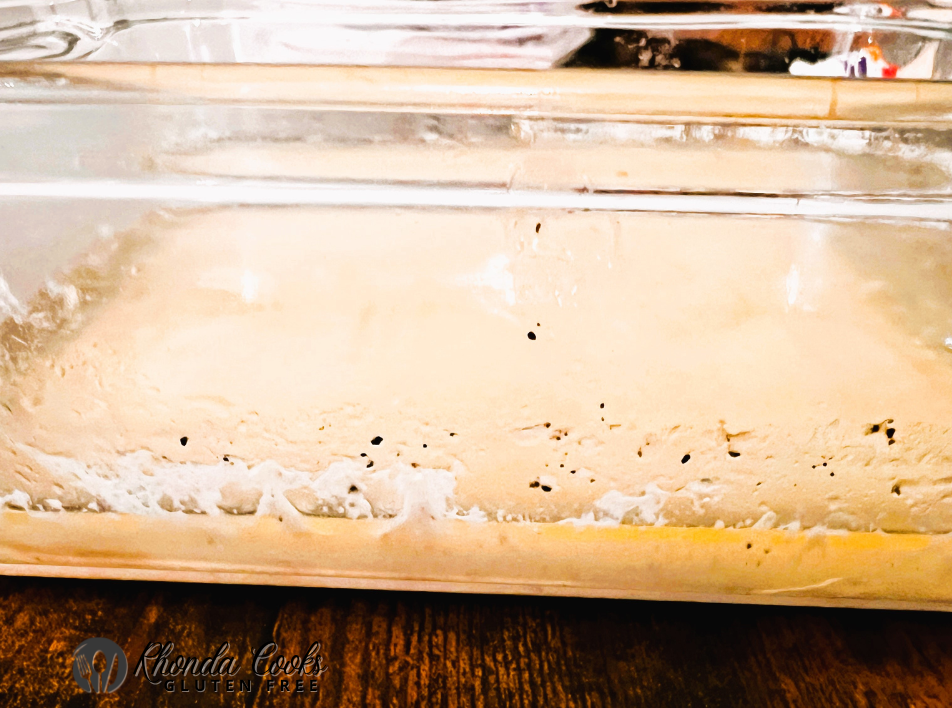


